

记录配置PhpStorm+Xdebug+chrome插件Xdebug helper的调试环境
分类:大杂烩
时间:2024-04-25 23:15
浏览:0
评论:0
安装Xdebug
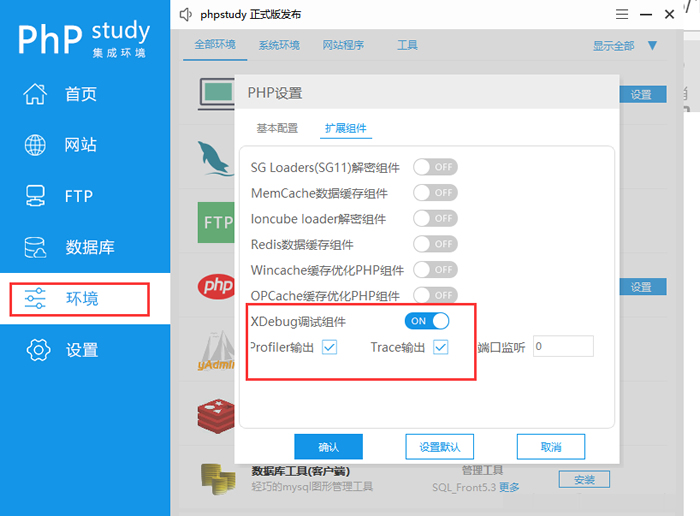
打开xdebug
我这边采用phpstudy安装,简单易用,如图所示打开xdebug
配置 php.ini
tips :这里选用的是php5.6.9版本
[Xdebug]
zend_extension=D:/phpStudy_64/phpstudy_pro/Extensions/php/php5.6.9nts/ext/php_xdebug.dll
xdebug.collect_params=4
xdebug.collect_includes = On
xdebug.collect_return=1
xdebug.show_mem_delta = On
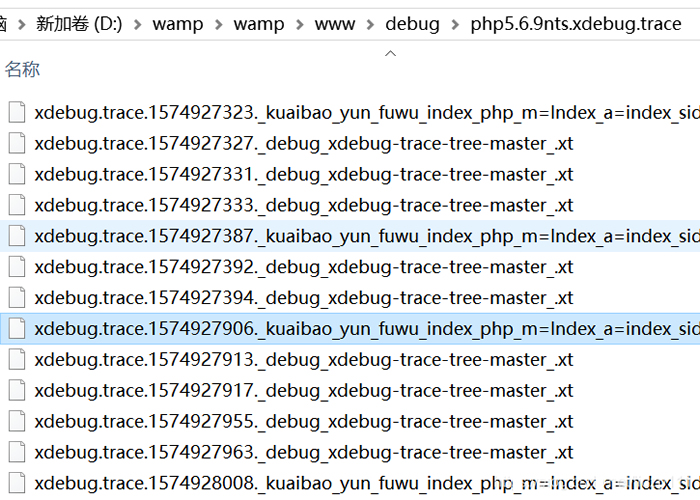
xdebug.auto_trace=On
xdebug.trace_output_dir=D:/wamp/wamp/www/debug/php5.6.9nts.xdebug.trace
xdebug.trace_enable_trigger=1
xdebug.trace_format=1
;代码跟踪日志文件格式
xdebug.trace_output_name = xdebug.trace.%t.%R
xdebug.profiler_enable=On
xdebug.profiler_output_dir=D:/wamp/wamp/www/debug/php5.6.9nts.xdebug.profiler
;xdebug.remote_enable=Off
xdebug.remote_host=localhost
;xdebug.remote_port=9000
xdebug.remote_handler=dbgp
xdebug.remote_enable=1 # 开启远程调试
xdebug.idekey='PHPSTORM' # sessionkey
xdebug.remote_port=9001 # 远程调试通信端口
查看是否安装成功
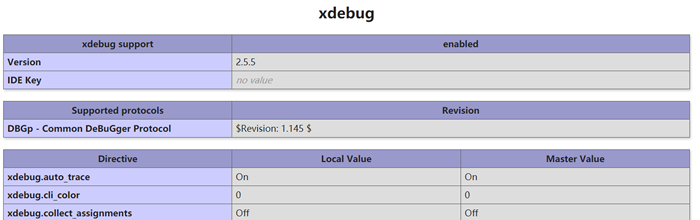
运行一段程序查看,是否有log输出
使用可视化工具查看日志
点击链接下载,xdebug trace 可视化工具:
splitbrain/xdebug-trace-tree
https://gitcode.com/splitbrain/xdebug-trace-tree/overview
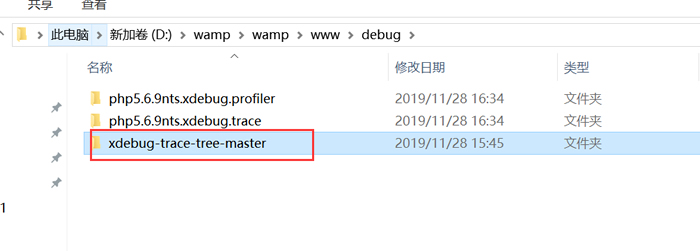
放入可访问目录
访问可视化工具并查看结果
很直观的可以看到程序的运行过程
配置PhpStorm的debug
打开设置对话框FIle->Settings
配置Debug :Languages & Frameworks -> PHP -> Debug,只需要把端口改为9001,和xdebug的配置保持一致
配置Server(就在Debug下面一个) :Languages & Frameworks -> PHP -> Servers,新建一台本地服务器(绿色加号),填写服务器名字以及host,确认debugger是xdebug

配置 DBGp Proxy
此处 IDE key 需要与 xdebug.idekey 一致。
Host 与 Port 均为所运行项目的地址与端口。

安装chrome插件Xdebug helper
不能翻墙的话,只能在百度搜索这个插件的安装包,下载下来直接拖到chrome浏览器安装
如果提示下图错误CRX_HEADER_INVALID,则将文件更名为.rar后缀,解压出来,再点击加载已解压的扩展程序就可以导入了
调试代码
将 PhpStorm 右上角的小电话点绿,开始监听

在浏览器中运行程序,在phpstorm的debugger窗口可以看到调试结果
打开xdebug
我这边采用phpstudy安装,简单易用,如图所示打开xdebug
配置 php.ini
tips :这里选用的是php5.6.9版本
[Xdebug]
zend_extension=D:/phpStudy_64/phpstudy_pro/Extensions/php/php5.6.9nts/ext/php_xdebug.dll
xdebug.collect_params=4
xdebug.collect_includes = On
xdebug.collect_return=1
xdebug.show_mem_delta = On
xdebug.auto_trace=On
xdebug.trace_output_dir=D:/wamp/wamp/www/debug/php5.6.9nts.xdebug.trace
xdebug.trace_enable_trigger=1
xdebug.trace_format=1
;代码跟踪日志文件格式
xdebug.trace_output_name = xdebug.trace.%t.%R
xdebug.profiler_enable=On
xdebug.profiler_output_dir=D:/wamp/wamp/www/debug/php5.6.9nts.xdebug.profiler
;xdebug.remote_enable=Off
xdebug.remote_host=localhost
;xdebug.remote_port=9000
xdebug.remote_handler=dbgp
xdebug.remote_enable=1 # 开启远程调试
xdebug.idekey='PHPSTORM' # sessionkey
xdebug.remote_port=9001 # 远程调试通信端口
查看是否安装成功
运行一段程序查看,是否有log输出
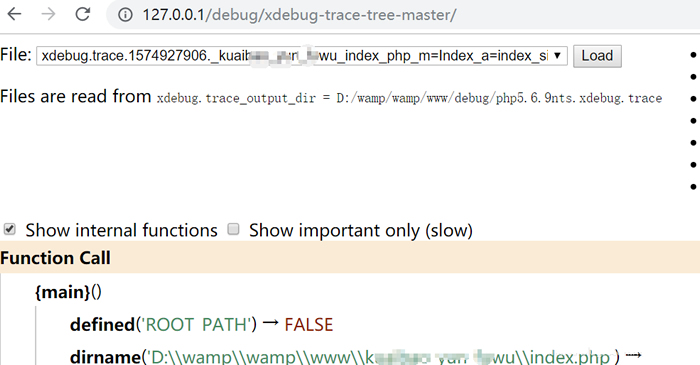
使用可视化工具查看日志
点击链接下载,xdebug trace 可视化工具:
splitbrain/xdebug-trace-tree
https://gitcode.com/splitbrain/xdebug-trace-tree/overview
放入可访问目录
访问可视化工具并查看结果
很直观的可以看到程序的运行过程
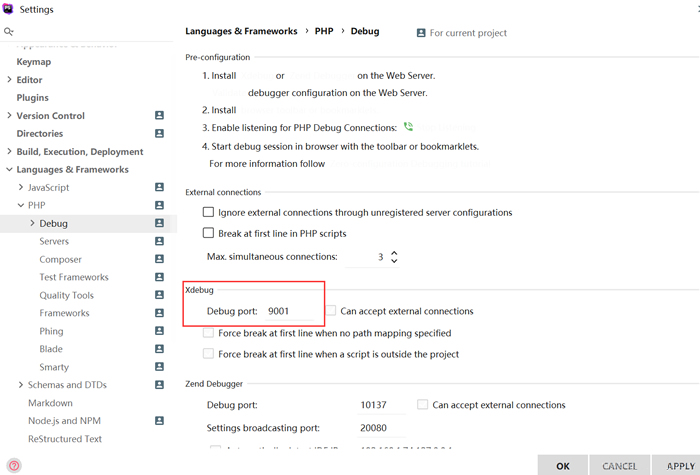
配置PhpStorm的debug
打开设置对话框FIle->Settings
配置Debug :Languages & Frameworks -> PHP -> Debug,只需要把端口改为9001,和xdebug的配置保持一致
配置Server(就在Debug下面一个) :Languages & Frameworks -> PHP -> Servers,新建一台本地服务器(绿色加号),填写服务器名字以及host,确认debugger是xdebug
配置 DBGp Proxy
此处 IDE key 需要与 xdebug.idekey 一致。
Host 与 Port 均为所运行项目的地址与端口。
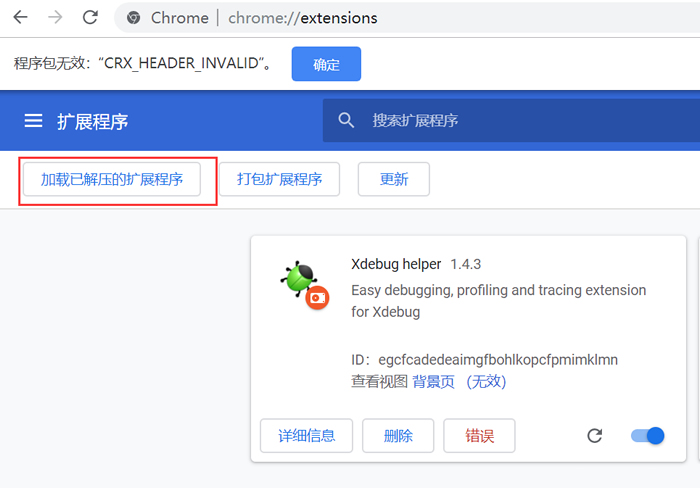
安装chrome插件Xdebug helper
不能翻墙的话,只能在百度搜索这个插件的安装包,下载下来直接拖到chrome浏览器安装
如果提示下图错误CRX_HEADER_INVALID,则将文件更名为.rar后缀,解压出来,再点击加载已解压的扩展程序就可以导入了
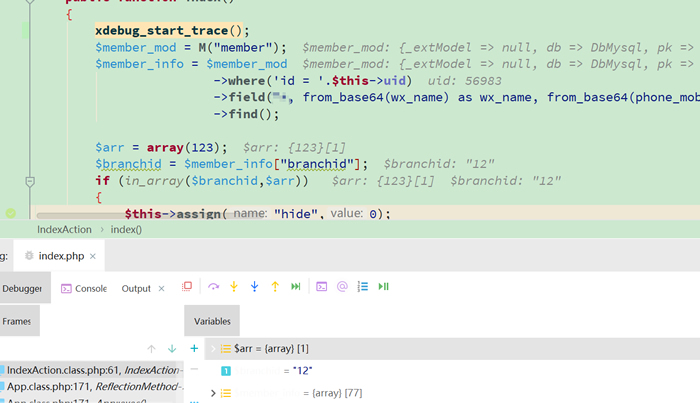
调试代码
将 PhpStorm 右上角的小电话点绿,开始监听
在浏览器中运行程序,在phpstorm的debugger窗口可以看到调试结果
1. 本站所有资源来源于用户上传或网络,仅作为参考研究使用,如有侵权请邮件联系站长!
2. 本站积分货币获取途径以及用途的解读,想在本站混的好,请务必认真阅读!
3. 本站强烈打击盗版/破解等有损他人权益和违法作为,请各位会员支持正版!
4. 大杂烩 > 记录配置PhpStorm+Xdebug+chrome插件Xdebug helper的调试环境
2. 本站积分货币获取途径以及用途的解读,想在本站混的好,请务必认真阅读!
3. 本站强烈打击盗版/破解等有损他人权益和违法作为,请各位会员支持正版!
4. 大杂烩 > 记录配置PhpStorm+Xdebug+chrome插件Xdebug helper的调试环境
